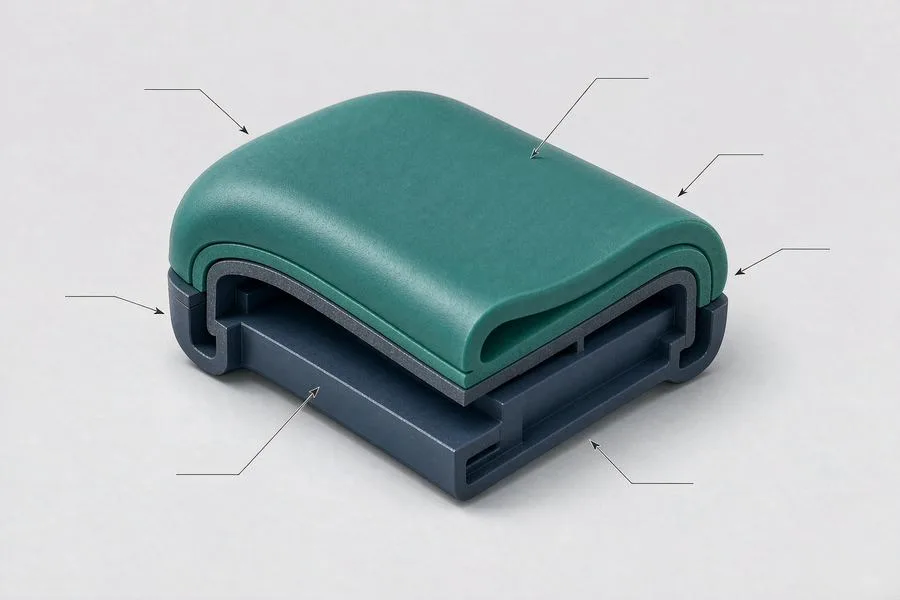
Two-Shot Molding Won't Bond? 7 Root Causes of Poor Adhesion in 2K and Overmolded Parts
Delamination in two-shot and overmolded parts is rarely a glue problem. Seven root causes — material compatibility, contamination, insert temperature, surface texture, venting, shrinkage stress and fill profile — with a check for each, plus how to measure bond strength instead of judging by hand.
Solution Details
Learn more about the core content of this solution
The short answer: when a two-shot or overmolded part will not bond, glue is almost never the issue. Adhesion in 2K molding comes from two things — polymer chain diffusion across the interface and mechanical interlocking on the mating surface. If it fails, at least one of four conditions is broken: interface temperature, surface cleanliness, material compatibility, or venting. The seven causes below each come with a way to check them, so the list can be used directly against a trial-run report.
1. Start by breaking one part
Do not judge from appearance. Snap or cut the part across the bond line and read the fracture surface:
| Fracture surface | What it means | Check first |
|---|---|---|
| Two layers separate cleanly, as if never in contact | No weld layer and no mechanical anchoring | Material compatibility → contamination → insert surface temperature |
| Stringing, soft resin residue left on the hard substrate | Partial weld — reaching, but not strong enough | Second-shot melt and mold temperature, packing, overmold wall thickness |
| Glossy patches, flow marks, yellow or burnt areas | Trapped gas forming an air cushion; contact pressure too low | Venting, gate position, injection speed |
| Insert pushed out of position, crushed, flash | A mechanical problem, not an adhesion problem | Second-shot speed, transfer point, insert rigidity |
2. Seven root causes and what to do
2.1 Incompatible materials — first on the list, most often skipped
How to check: the fracture surface is clean, no stringing, and changing temperature, pressure or time barely helps. That is a material pair problem; no amount of machine tuning will fix it.
Why: when polarity, surface energy or crystallisation behaviour differ too much, chains cannot diffuse across the interface and only mechanical interlocking is left — which is very limited on a smooth surface.
What to do: choose proven pairs (PC or PC+ABS with TPU and TPE, ABS with TPE and TPU). Specify an overmolding-grade TPE with compatible blocks or compatibiliser; general-purpose grades often fail on PC and PA. For genuinely incompatible pairs, use a primer, plasma or flame treatment to raise surface energy, or design mechanical interlocks (dovetails, undercuts, knurling, through-holes) so the joint locks instead of glues. Pressure alone will not help.
2.2 Contamination: release agent, oil, fingerprints, dust, flash
How to check: adhesion varies from good to bad, defects cluster in one area or on one shift, and wiping with ethanol clearly improves results.
What to do: no silicone release agent on the first shot — if one is unavoidable, use a dry, silicone-free type and confirm compatibility. Move parts in lidded boxes, wear gloves, never touch the bond surface bare-handed, and use ionised air before the second shot. Clean flash and grease at parting lines and insert fits; flash physically jacks the two layers apart.
2.3 First-shot surface temperature — the classic "it must be the material" case
How to check: same mold, same lot — only shortening the interval between shots, or pre-warming the insert, changes adhesion.
Why: the second-shot melt has to heat the interface into the welding window long enough for chain diffusion. A fully cooled insert freezes the interface on contact and produces only apparent adhesion.
What to do: minimise the time between shots (the rotating platen of a 2K machine exists for this), hold or pre-heat inserts within a safe margin below their heat deflection temperature, and raise second-shot mold temperature to give the interface dwell time.
2.4 Bond surface too smooth, or texture in the wrong direction
How to check: on the same part, polished areas peel first while textured areas hold.
What to do: a mirror finish is not an advantage on a bond surface; moderate roughness interlocks better. Fine texture perpendicular to the load direction beats texture running with it. Wrap the soft resin around the edge of the hard part, or add undercuts, to convert peel stress into shear stress.
2.5 Poor venting creates an air cushion
How to check: local gloss differences, flow marks, yellowing or short shots along the bond line; bubbles visible on the peeled surface.
What to do: vent at the last point to fill (typically 0.02–0.03 mm deep, width depending on cavity), add insert or vacuum venting where needed, and reposition the gate so the flow front advances in one direction and pushes gas out instead of enclosing it.
2.6 Shrinkage mismatch and structural stress: edges lift first
How to check: the centre holds but the perimeter lifts; delamination grows after ageing or heat exposure.
What to do: keep overmold thickness uniform — below 0.6 mm it is hard to fill, too thick increases shrinkage, with 0.8–1.5 mm a common working range. Wrap the edge rather than butting it, add radii at sharp corners, and anneal stress-sensitive parts before re-testing adhesion.
2.7 Fill profile and pressure: strong near the gate, weak far away
How to check: good adhesion near the gate, peeling at the far end.
What to do: profile the second shot (slow–fast–slow) to avoid impacting and displacing the insert and to avoid a cold slug, raise melt and mold temperature, and pack at the end of fill so pressure reaches the extremities. If the insert is not rigid enough, stiffen it with ribs first.
3. Stop using thumb tests as inspection
Judging adhesion by hand gives inconsistent verdicts within a lot and lets problems reach the customer. Instead: measure peel or pull strength on a dedicated two-shot bond tester, record values against an internal lower limit agreed with the customer, and keep data for first-off and patrol inspection. Add environmental validation — damp heat, thermal cycling, hot water immersion, drop — then re-test. Put the numbers into trial reports and outgoing inspection records so they can be traced.
4. Move the problem ahead of mold making
Three of the seven causes are design issues that tuning cannot fix, and the rest become change-mold cost once steel is cut. The cost dividing line is therefore before the mold:
- DFM first: a manufacturability report within 48 hours of receiving 3D data, focused on the 2K bond surface — material pairing, overmold thickness, interlock features, venting and gate position.
- In-house tooling: 18 mold-making machines (3 high-precision CNC from Taiwan, China; 4 mirror EDM; 4 conventional EDM; 4 grinders; 3 milling machines) — issues found at T1 are reviewed and corrected the same day.
- In-house 2K capacity: 20 YIZUMI injection molding machines, with 100% of core two-shot molding performed in-house and never outsourced; about 20 additional partner machines cover single-color overflow and auxiliary operations under unified quality and delivery control.
- Measured acceptance: two-shot bond tester, 2.5D vision measuring system and colorimeter turn "how strong is it" into a number.
- System support: established and operated in accordance with ISO 9001 and IATF 16949, with IQC, first-article approval, IPQC patrol and OQC before shipment.
5. Questions we are asked most
The customer specified two incompatible materials — then what? First check whether an alternative grade is acceptable; many "incompatible" cases are simply non-overmolding grades. If the original material is mandatory, combine primer, surface treatment and mechanical interlock, and prove it with peel data at T1 rather than after mass production.
Only some cavities in a multi-cavity mold fail? Check mold temperature balance and venting first — cavity-to-cavity temperature differences and inconsistent vent depth are the usual causes; gate balance comes second.
Fine in pilot runs, unstable in mass production? Usually the cycle changed: inserts sit longer in the workshop, resin dwells too long in the hopper and degrades, release agent gets applied "by feel". Writing the shot-to-shot interval and drying parameters into the process sheet is the cheapest fix available.
If you have a delaminating part or a two-shot / overmolding project under evaluation, send 3D data, material and annual volume: quotation within 24 hours, DFM report within 48 hours. Tel +86 159 8681 0439 (WeChat available), email Jacobhe@szdofo.com.